handipay can turn your invoices into a file your accounting software imports, so you never type an invoice in twice. This guide is the handipay side: choosing the invoices, picking the right file and reading what handipay tells you about it. Bringing the file into your accounting software has its own guide, linked at the end of the first part.
Start an export
Open Invoices.
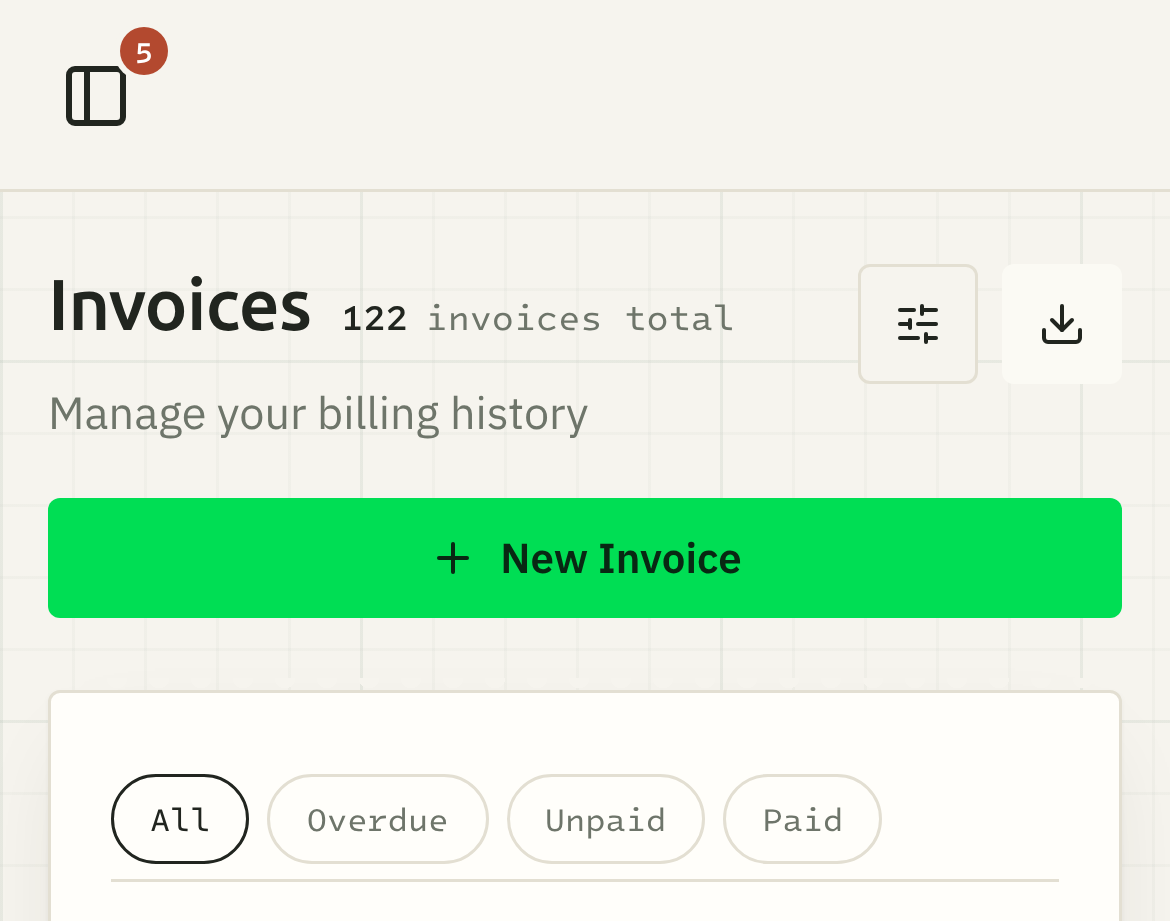
Press Filters and choose the invoices you want, by date, status or amount. The export takes every invoice that matches your filters, not just the ones on your screen.
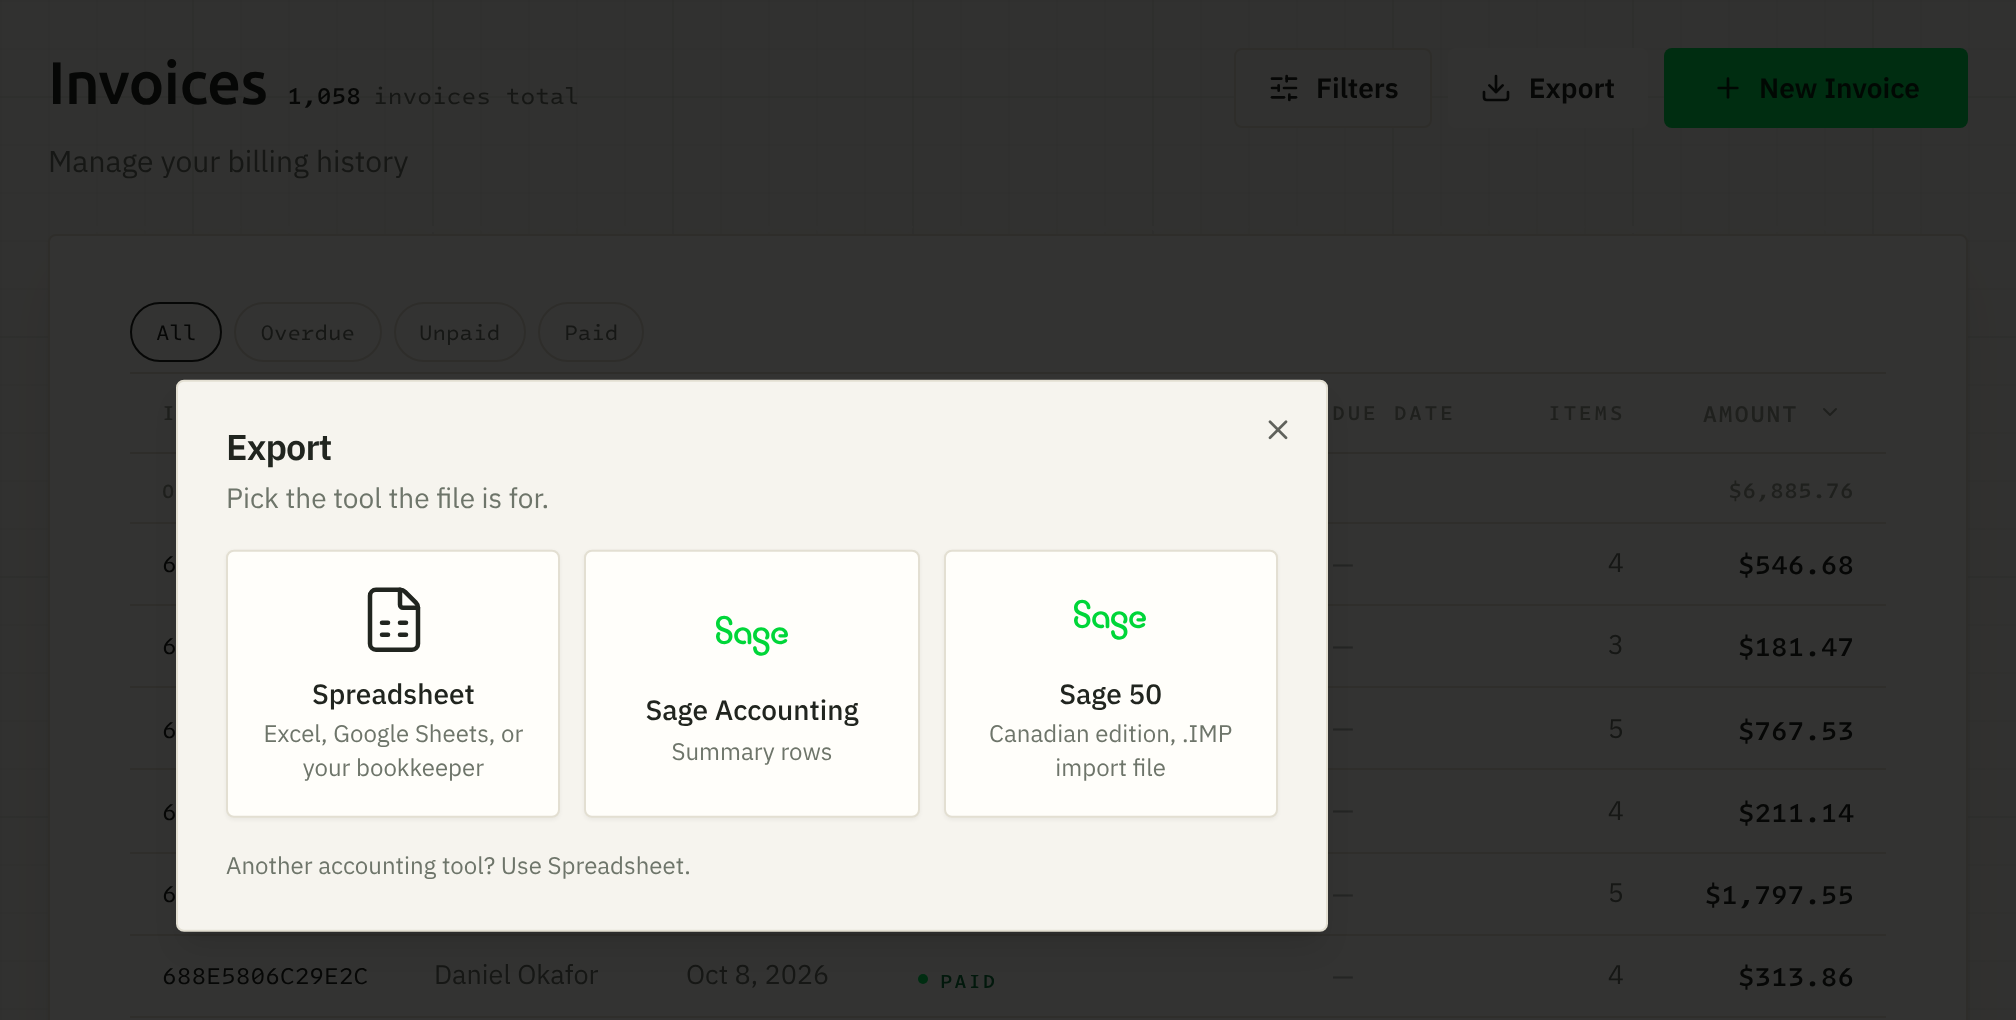
Press Export. On a phone, it's the button with only a download icon, next to Filters. A window opens with three tiles: Spreadsheet, Sage Accounting and Sage 50.
Pick Sage Accounting or Sage 50 if that's what you use, or Spreadsheet for anything else. The tiles close, and that tile's own export window opens. Not sure which? See which export to pick.
Check the preview. It shows the first few invoices as they'll appear in the file, and how many invoices match. Every tile but Sage 50 counts the file's rows too.
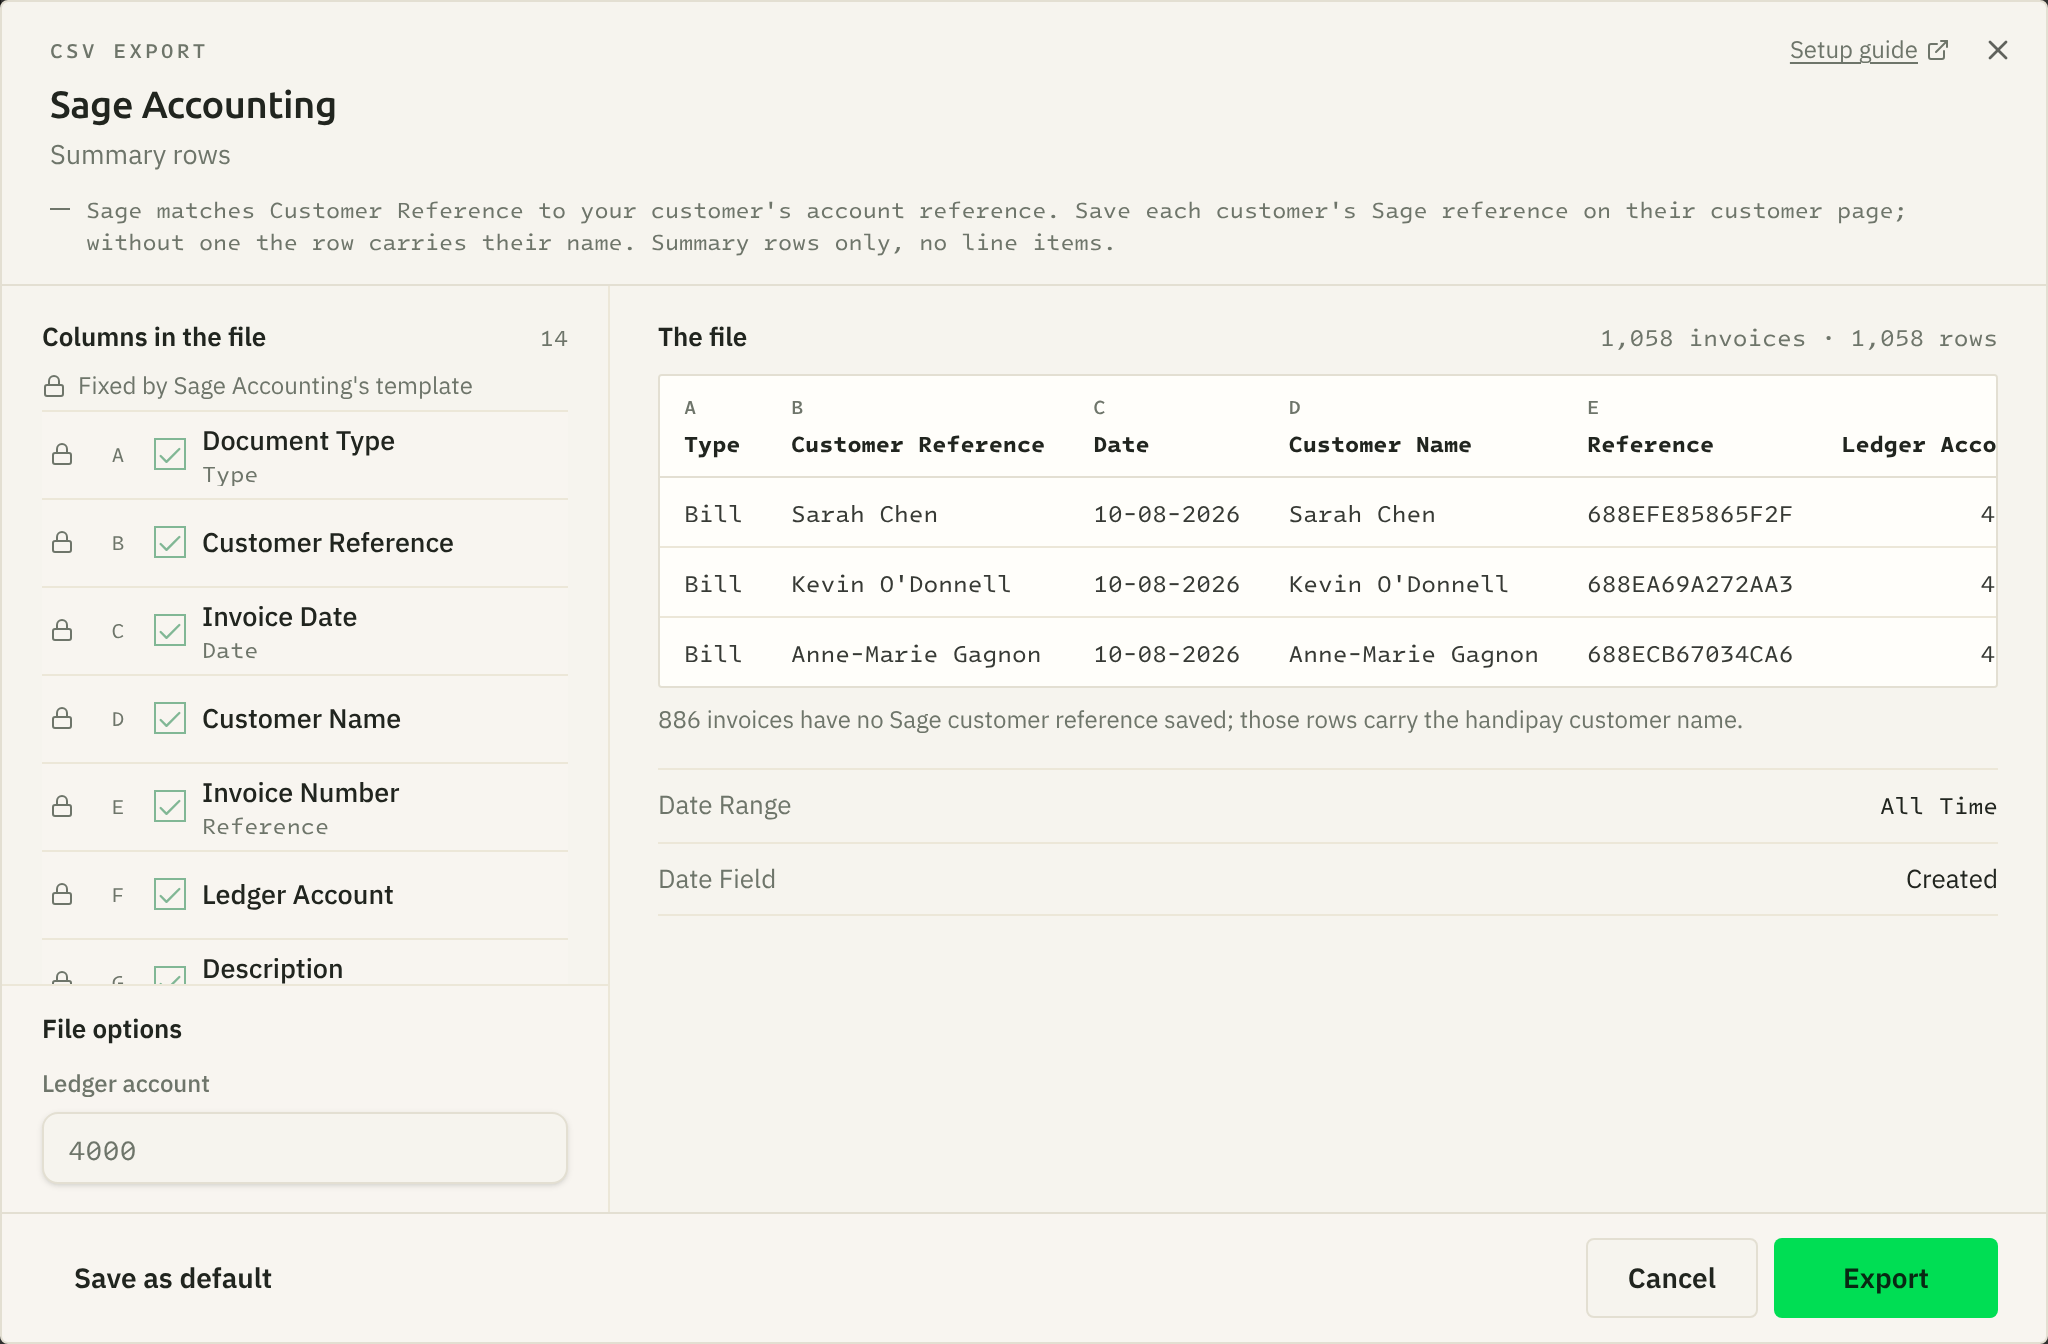
Press Export at the bottom of the window. Your browser saves the file, usually in your Downloads folder.
If the list shows no invoices, Export is greyed out. Change your filters until it shows the ones you want.
Next, bring the file into your accounting software:
For a spreadsheet, see exporting to a spreadsheet.
Which file your accounting software gets
Each tile makes a different file, laid out the way that accounting software's import usually expects. The Spreadsheet and Sage Accounting files are CSV files: plain spreadsheet files that Excel or Google Sheets can open. The Sage 50 one is an .IMP file, the import format Sage 50 reads.
| Tile | The file |
|---|---|
| Spreadsheet | A CSV file for Excel, Google Sheets or your bookkeeper. One row per invoice, or one per line item. |
| Sage Accounting | A CSV file with one summary row per invoice, and no line items. |
| Sage 50 (Canadian edition) | An .IMP file with one block per invoice. |
The Sage Accounting and Sage 50 export windows each list a few things to know before you import, the short version of that software's guide. Sage Accounting shows them under the title. The Sage 50 window has more of them, so they're folded away above the preview: press the line that starts Before you import into Sage 50 to open them.
Sage Accounting takes its columns exactly as its import template sets them, so those can't change. The Sage 50 file has no columns at all. The Spreadsheet file is the one you arrange freely: see exporting to a spreadsheet.
Changing columns or options in the export window changes that one file. To keep a setup for next time, see saving your settings.
Big exports come in batches
A file holds only so many invoices. When your filters match more than that, handipay puts the most recent invoices in the first file and tells you so before you export.
| Tile | Most per file |
|---|---|
| Spreadsheet | 5,000 invoices |
| Sage Accounting | 2,000 invoices |
| Sage 50 (Canadian edition) | 1,000 invoices |
A file holds whole days whenever it can, so when you carry on, nothing is skipped and nothing comes twice.
Press Export. The first file downloads, and handipay tells you how many of the matching invoices are in it.
The button now says Export next batch. Press it for the next file. It carries on with the invoices dated before the oldest one in the file you just downloaded.
Keep going until there's no next batch.
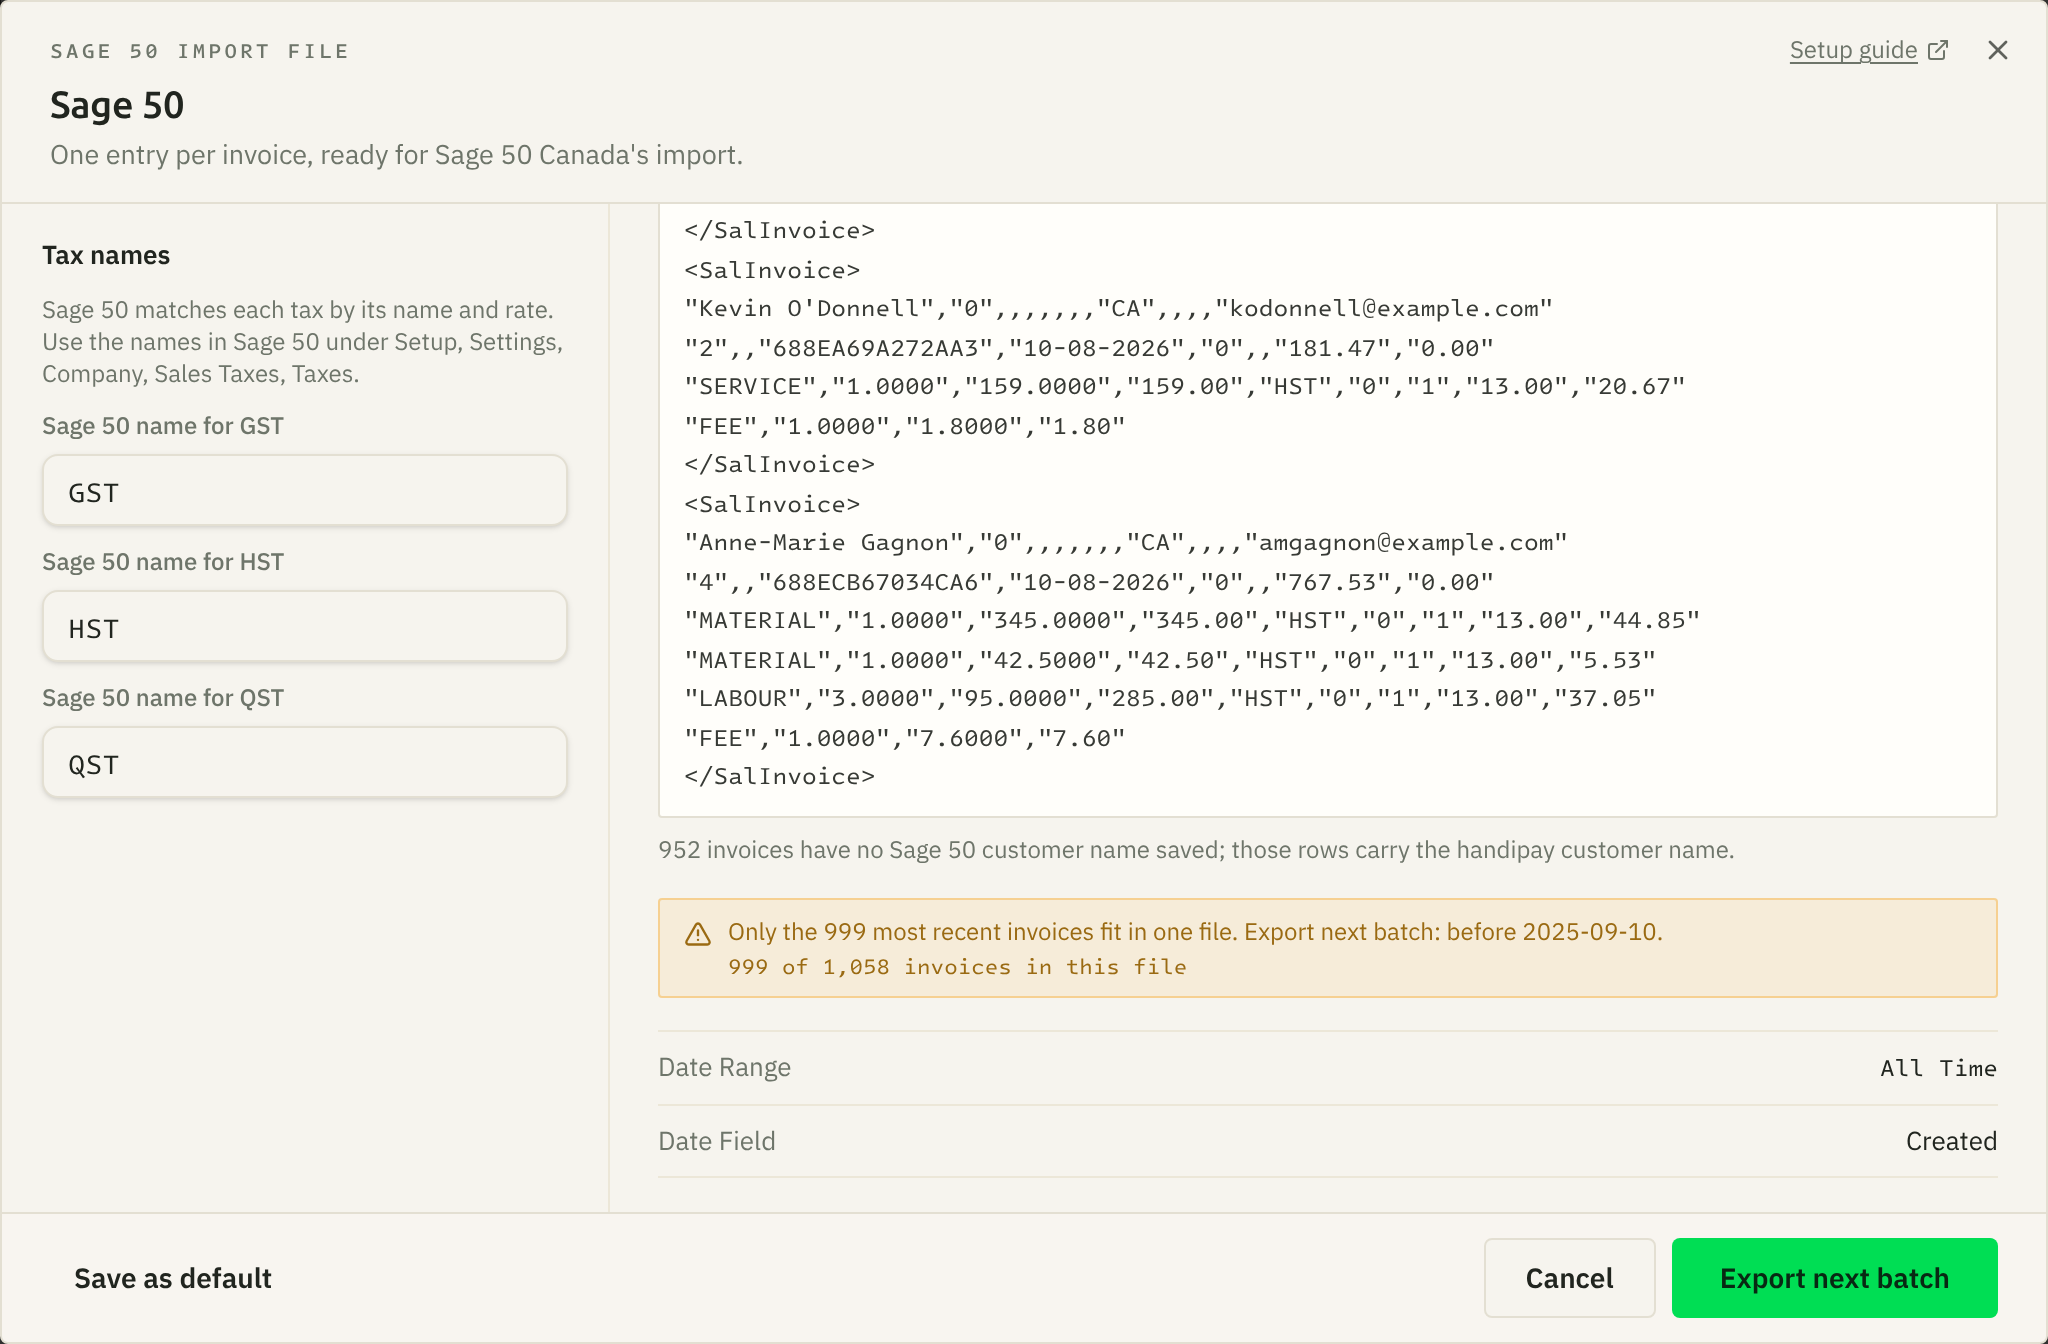
Each file is a separate import, so import every one of them into your accounting software.
Now and then a single day has more invoices than one file holds. handipay then puts as many of that day's invoices in the file as fit, says so, and offers no next batch. Use Filters to split that day by status or by amount, and export each part on its own.
Save your settings
Owners, accountants and managers can save the columns and options a tile starts with, for everyone in the business. Every export from the invoice list then opens with them.
The quick way: set up the export window the way you want it and press Save as default.
To see or change all of them in one place:
Open Settings.
Next to Export defaults, press Edit.
Pick the tab for your accounting software, set its columns and options, and press Save changes.
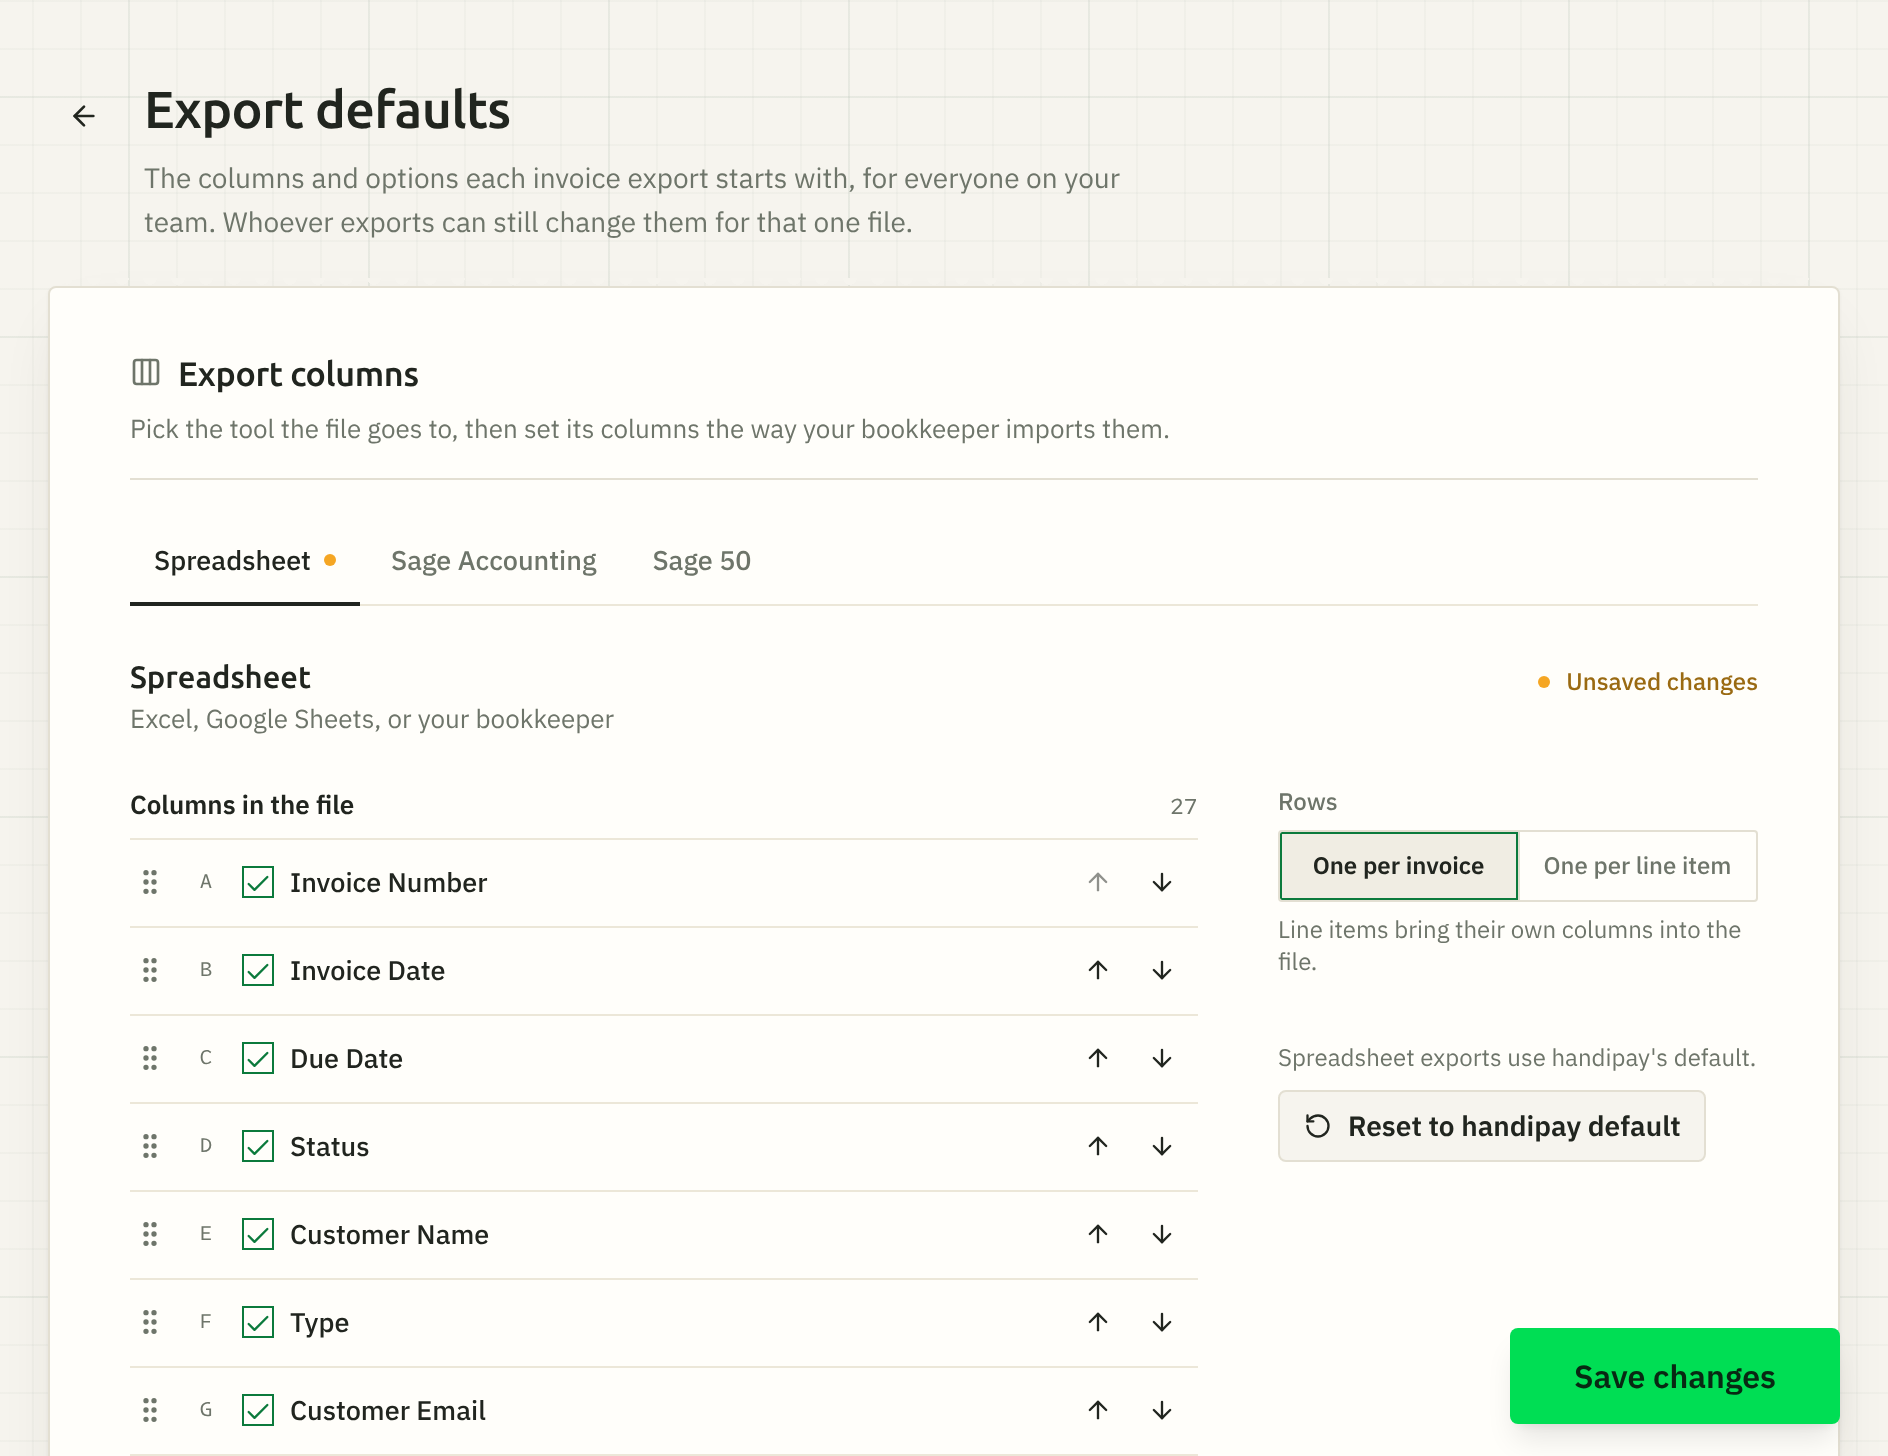
To go back to handipay's own setup for a tile, open its tab and press Reset to handipay default, then Reset to confirm.
Sage Accounting and Sage 50 (Canadian edition) files have fixed columns, so for those only the options are saved: the ledger account, or the Sage 50 tax names.
What the warnings mean
Under the preview, handipay may add a line or two about the file. None of them stops the export. They tell you what to fix first, or what to check after you import.
Customers with nothing saved
An accounting ID is the name or code your accounting software uses for a customer, saved on that customer in handipay. See matching your customers to your accounting software.
For example: "1 invoice has no Sage 50 customer name saved; those rows carry the handipay customer name." That customer has no accounting ID for this accounting software, so the file uses their name in handipay. If that name isn't exactly the one in your accounting software, the import can't match it to the right customer.
Sage Accounting matches on the customer reference, so handipay always counts the invoices without one. Sage 50 (Canadian edition) matches on the name, so handipay counts only once at least one customer in the file has a Sage 50 name saved. If none of them has one, handipay assumes your names already match and stays quiet.
To fix it, save the name or reference on each of those customers.
A Sage reference that's too long
Sage Accounting customer references are 10 characters or fewer. A longer one still goes in the file, but Sage Accounting is likely to refuse it. Change it on the customer in handipay so it's the reference Sage Accounting has.
Contact details left blank
"Customer contact details are available to owners, accountants and managers." Team members below manager can export too, but a customer's phone number and address come out blank in their file. The file still imports. If you need the addresses, have an owner, accountant or manager export it.
Sage 50 (Canadian edition) only
A Sage 50 file can carry a few more:
Characters Sage 50 can't store, such as an emoji, were replaced: double quotes with
', line breaks and tabs with spaces, anything else with?.- A Sage 50 customer name longer than 52 characters, the most Sage 50 holds. It happens when a customer has no Sage 50 customer name saved and their handipay name is long. Save a Sage 50 customer name for them.
- An invoice with no customer name or email. Sage 50 needs a customer name, so add one in handipay before importing.
- A tax without a known rate, which the file leaves off. Sage 50 will post that invoice without it.
- An invoice whose lines add up to a different total than handipay's invoice. Sage 50 posts the sum of the lines.
Exporting to a spreadsheet
Spreadsheet is for Excel, Google Sheets, your bookkeeper, or any accounting software without a tile of its own. It's the one file you arrange freely: switch columns on and off, and drag them into the order you want, such as the order your accounting software's import asks for. Under Rows, choose one row per invoice or one per line item. A file holds up to 5,000 invoices.
Exporting to Sage Accounting
A Sage Accounting file holds up to 2,000 invoices. Sage Accounting finds each customer by their customer reference, so save the reference on each customer first. Put your sales ledger under Ledger account (handipay uses 4000 if you leave it blank).
Next: import the file into Sage Accounting.
Exporting to Sage 50 (Canadian edition)
A Sage 50 file holds up to 1,000 invoices. Sage 50 matches each tax by its name and its rate, so the Sage 50 export window has a box for each tax on your invoices, such as Sage 50 name for GST. Type the name your Sage 50 uses: TPS and TVQ, for example, if that is what your Sage 50 calls them. Sage 50 lists its tax names under Setup › Settings › Company › Sales Taxes › Taxes.
Press Save as default to keep the names, or set all five (GST, HST, PST, RST and QST) on the Sage 50 tab of Settings › Export defaults. Every Sage 50 export then starts with them.
Next: import the file into Sage 50.
Still stuck? Email [email protected].